Thursday, 14 March 2013

Snow Book

Another and finally at long last completed book .  This has been over two years in the making.  Many many versions have been fiddled and manipulated, heaven only knows why I have put so many processes into one tiny little book making it intricate and complicated to make....never again.  But I am very happy with the final result and it has an interesting destination which I will divulge soon.

Folded, embossed, stitched and dotted with text from an old Eastern block typewriter, (called Erika!) the ‘Snow Book’ is a culmination of work started on a residency in Quebec City and completed in the UK.


This is the embossed cover with a small stenciled wrap


The book in full view


 This is a chine colle woodcut


Digital Image


Transfer copy print from a large drawn rubbing of a Canadian wooden snowshoe


-->


Wednesday, 6 March 2013

Altered Books


My new project:

In North Wales

Walking and creating work.

I have  been invited to create an altered book, which I have not done before.
So I went searching in second hand book shops for an appropriate book.  And here it is

I am a bit tentative, I was always told to look after my books, not mark them and certainly not destroy them.  So I have a bit of childhood programming to crash through.


So my start is a walk round Llyn Crafnant and some photos.  And I liked the book so much I bought another for safety!!!!!  I want to be brave enough to really go for it and alter it in quite a radical way.


A Spoon and A Glove

The book collaboration is finally finished...(that was a long weekend!)
It took a long time and lots of experimentation to devise the spine for the pages and then I ruined one book by gluing a page upside down....I won't do that again in a hurry.  Trying to photograph it was a challenge due to usual lighting issues.  I used a reflector made out of tin foil in the end which helped.  So here it is in all its glory.


 The front page


 which opens out to become the Glove and the front of the Spoon


'A Glove and A spoon'.....
every day is a school day
handing a spoon
with a silky glove
I eat art


Madeleines' page

My page


Moiras' page


Information about our book:

 
'Following a democratic decision to challenge ourselves, we chose a glove and a spoon as the subject matter for this collaboration.  There was resistance on all our parts as we were initially each drawn to objects of a more organic nature.

In leaving our personal desires behind we decided upon those two objects and sought to challenge our personal needs to stay within our comfort zone.  We gravitated towards a poetic rhythm and searched hard in this response to both objects'

The back page which opens out and


folds in.


Thursday, 31 January 2013

Discovering Diffused Relief Printing
A Little Master Class!


Oooh.  I am really liking this.  Bearing in mind that these are not finished prints but just experiments at this current time, just to show the possibilities.

I went on a trip last week to work in Dunfermline Print Studio, which is a lovely, cosy place, to meet up with printmakers Aine Scannell and her friend Tatiana. It was Aine who introduced me to this wonderful easy process.

I love the simplicity and potential for my work this offers.....here is the process in a nutshell.
  • Make a plate out of mount card/matt board the size of your print as you would for a collagraph print.  I PVA'd and varnished my plate with Lascaux Hard Ground, you could use shellac.  Leave overnight to cure.
  • Cut out some shapes in mount card /matt board (These will appear on your print as more dense/opaque than the background.)  You can varnish these if you want to use them repeatedly as they can get ink on them.
  • Lay these shapes on your press bed.  I have marked where the edges of my plate will be with blue tape so I have reference and can place the shapes where I want them to appear in my print.

  • Using ink that has been modified with transparent ink/extender, ink up your plate.  This plate has been used a few times,the white mark is from an earlier embossment.  Then lay your inked up plate ink side facing upwards on top of the card shapes like so.
  • The paper is then placed on top.  I used the lovely cheap Chinese paper on a roll from China Town in Manchester which is quite good for test prints of this kind.

  • And then roll through the press


Another print with different shapes added under it


And without moving plate having taken off the first print pop another sheet of paper on the plate and roll through again.

 
I use quite a lot of lace and wallpaper in my work so I tried using a piece of lace which I first PVA'd and varnished to give it some welly under the mount card.  This is the initial print.  I can see now why it is called diffused relief, as this lace looks very diffused!!!


and this is the ghost print


I am looking forward to playing with this process using masks to make further layers

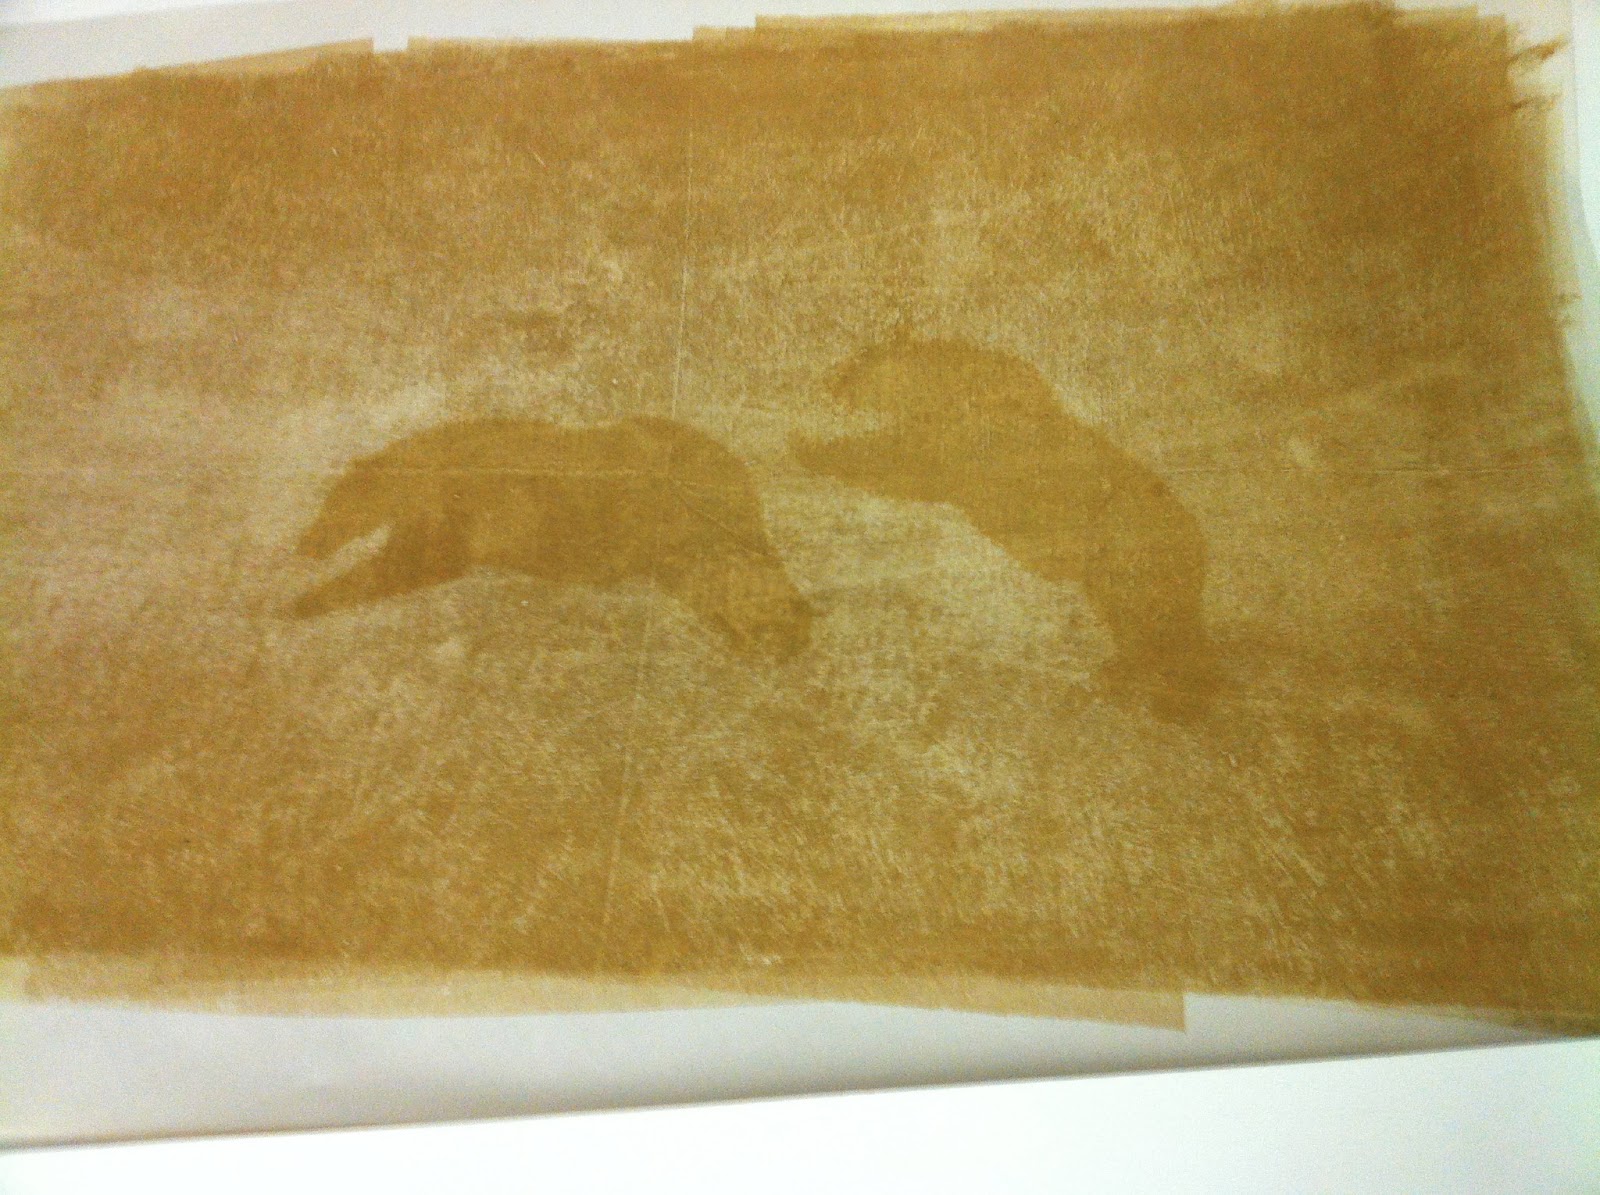
And a diffused relief print that Aine made on the same day, the polar bear shapes having been cut out and used in the same way as described above.


Friday, 25 January 2013

Yey, A New Year and I have somehow managed to blast through the impenetrable wall that was blocking my creativity. With the aid of some new little ipod speakers and some charcoal and pastel I had a lovely week drawing and the I can't tell you the relief.

Sometimes it is just a matter of going back to base.  DRAWING.  And it is about the authenticity of the mark.  It is about being aware when you are in that wonderful zone of connectedness and then slipping out of it when the mark becomes contrived and stopping.  I will post better images, (apologies for the peculiar colour cast on these from the fluorescent lights) on my website when the light is good....and thank you  Amanda


Thursday, 20 December 2012

The 30 Minute Book 

That took all morning!  I just got carried away


So I started off with a piece of buff card from packaging and stitched in paper from the inside of envelopes and cartridge paper


Having already glued some black fabric to the cover


And finally added an embossed wrap.....amazing, I just held the damp somerset paper over a plastic alphabet letter stencil and forced the paper to emboss with my fingers and then gently with the end of a rounded paintbrush.

Wednesday, 21 November 2012

Book Collaboration

We have now all finished our page for the book.......

my page.....

and now we have almost decided on the binding, just waiting for Quebec now to have confirmation.  It is exciting, I would have never made this using the subject/object matter we have worked with and it has expanded my thinking somewhat.

Hopefully have some images of final book to show by the weekend